CHIP-8 emulator in WebAssembly using Rust
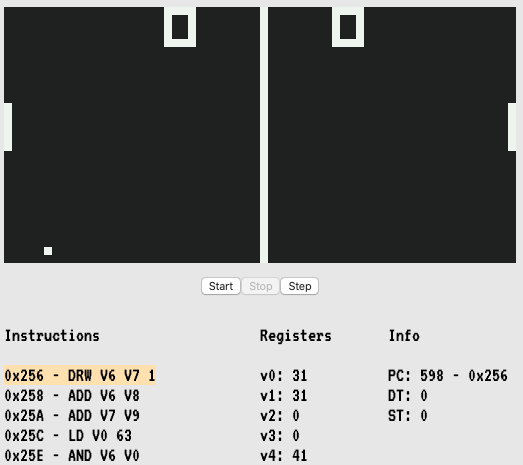
January 26, 2020 -Lately I have been working on an emulator for the CHIP-8 that can compile to WebAssembly using Rust. The source code is available on GitHub. And you can play a game of pong here.
I've always wanted to write an emulator for an older hardware like the Nintendo Entertainment System or Game Boy Advance, but decided to start with a simpler project that could be finished over the course of a few nights. The CHIP-8 is a great starter emulation project, it has:
- A relatively small instruction set (35 instructions)
- 16 general purpose registers
- A 64x32 monochromatic display
- A 16 character hex based keypad
- No interrupts, but it does have two timer registers that count down at 60 Hz
A few references I found useful to get started are this post by Laurence Muller, Cowgod's Chip-8 Technical Reference, and this post by Colin Eberhardt. If you want to create your own emulator I highly recommend taking a look at the above pages.
Implementation
I won't go too deep into implementations details here, but if you want to know more the source code is available. I represented the CPU in Rust like this:
pub struct Cpu {
    // 4k Memory
    pub memory: [u8; 4096],
    // Program Counter
    pub pc: u16,
    // 16 general purpose 8-bit registers, usually referred to as Vx, where x is a hexadecimal digit (0 through F)
    pub v: [u8; 16],
    // Index register
    pub i: u16,
    // The stack is an array of 16 16-bit values
    pub stack: [u16; 16],
    // Stack pointer
    pub sp: u8,
    // Display - 64x32 pixels
    pub display: [u8; 64 * 32],
    // Delay timer
    pub dt: u8,
    // Sound timer
    pub st: u8,
    // Keyboard
    pub keys: [bool; 16],
}
Memory
The system's memory map looks like:
- 0x000-0x1FF - In original implementations the CHIP 8 interpreter.
- 0x050-0x0A0 - In emulators stores the 4x5 pixel font set (0-F).
- 0x200-0xFFF - Program ROM and work RAM.
One of the first things you will need to do is load the program into memory starting at position 0x200.
Opcodes
The CHIP-8 has 35 opcodes you will need to handle, all of which are two bytes long. First you need to extract the opcode, since memory elements are 8 bits and an opcode is 16 bits, we need to fetch two locations from memory and do some bit shifting to get a u16 opcode.
let code1: u16 = self.memory[self.pc as usize] as u16;
let code2: u16 = self.memory[(self.pc + 1) as usize] as u16;
let opcode: u16 = code1 << 8 | code2;
An opcode will look something like 0x7301. I highly recommend writing a disassembler to make it easier to read. An example of doing so is here. In this case the 0x7301 is displayed as ADD V3, 01 or in other words, add 1 to the current value of register V3.
Thanks to Rust's support for pattern matching over ranges, handling each opcode is relatively easy to do:
match opcode {
    0x7000..= 0x7FFF => {
        // 7xkk - ADD Vx, byte
        // Set Vx = Vx + kk.
        let x = ((opcode & 0x0F00) >> 8) as usize;
        let kk = (opcode & 0x00FF) as u8;

        // Note the overflowing_add, since addition values are 8 bits adding
        // 255 + 2 should overflow and result in 1.
        let (result, _) = self.v[x].overflowing_add(kk);
        self.v[x] = result;
        // Increment the program counter to point at the next opcode.
        self.pc += 2;
    },

    // ...
    // code to handle the remaining opcodes would go here
    // ...

    _ => {
        // This is an opcode we don't know how to handle yet
        self.pc += 2;
        // EmulateCycleError is a custom error defined elsewhere in the code
        let error = EmulateCycleError { message: format!("{:X} opcode not handled", opcode) };
        return Err(error);
    }
}
Handling keyboard input in JavaScript
Running the emulator and communicating between JavaScript and WebAssembly is easy thanks to the Rust wasm-pack tool.
In this case we annotate this Rust code with #[wasm_bindgen] so we can call it from JavaScript. Note that we are using the unsafe keyword here because CPU is a static value that we hold it's state in.
#[wasm_bindgen]
pub fn key_down(key: u8) {
    unsafe {
        CPU.keys[key as usize] = true;
    }
}
Then in JavaScript we can call update the state of the keypad on the WebAssembly side like this:
import("./crate/pkg/index.js").then(wasm => {
  document.addEventListener("keydown", event => {
    let keyCode = keyMap[event.key];
    if (keyCode >= 0 && keyCode <= 0xf) {
      wasm.key_down(keyMap[event.key]);
    }
  });
});
The keyMap is a mapping from the user's keyboard to the hex based keypad on the CHIP-8, and looks like this:
// CHIP-8 Keypad    User Keyboard
// +-+-+-+-+        +-+-+-+-+
// |1|2|3|C|        |1|2|3|4|
// +-+-+-+-+        +-+-+-+-+
// |4|5|6|D|        |Q|W|E|R|
// +-+-+-+-+   <=   +-+-+-+-+
// |7|8|9|E|        |A|S|D|F|
// +-+-+-+-+        +-+-+-+-+
// |A|0|B|F|        |Z|X|C|V|
// +-+-+-+-+        +-+-+-+-+

const keyMap = {
  '1': 0x1,
  '2': 0x2,
  '3': 0x3,
  '4': 0xc,

  'q': 0x4,
  'w': 0x5,
  'e': 0x6,
  'r': 0xd,

  'a': 0x7,
  's': 0x8,
  'd': 0x9,
  'f': 0xe,

  'z': 0xa,
  'x': 0x0,
  'c': 0xb,
  'v': 0xf,
};
Running the emulator
We use window.requestAnimationFrame() to run 9 cycles on the cpu 60 times per second, then update the HTML canvas display and the UI. We run 9 cycles because the CHIP-8 seems to run at about 500hz, and calling 9 cycles 60 times per second gets us to 540 hZ, which is close enough for this project.
Note that with window.requestAnimationFrame()
The number of callbacks is usually 60 times per second
but will generally match the display refresh rate in most web
browsers as per W3C recommendation.
So if your monitor's refresh rate is not 60 Hz the emulator will likely run either too fast or slow. For this project it is a compromise i'm ok with, but it is something that could be improved.