Elixir on the BeagleBone Black - Blinking an LED
December 09, 2015 -In this post we will see how to run the "Hello, World" of embedded devices, blinking an LED on a breadboard. We will be using the Elixir programming language and a BeagleBone Black.
I have also written up similar instructions for the Raspberry Pi.
The final result will look like this:
Elixir programming language
Elixir describes itself:
Elixir is a dynamic, functional language designed for building scalable and
maintainable applications.

Elixir leverages the Erlang VM, known for running low-latency, distributed and
fault-tolerant systems, while also being successfully used in web development and
the embedded software domain.
Some of Elixir's selling points are:
- Runs on the rock solid Erlang Virtual Machine.
- Offers trivial interop with Erlang code, libraries, and frameworks including the OTP.
- Code looks a fair bit like Ruby which many may find easier to grok than Erlang's Prolog inspired syntax.
So far it has been an absolute joy to use.
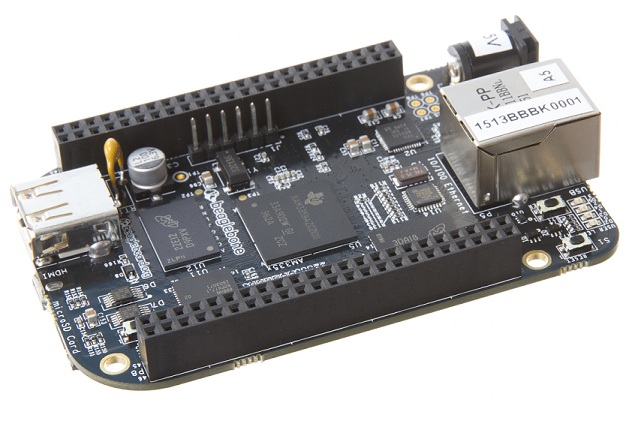
BeagleBone Black
The BeagleBone Black is a small and relatively low cost 1Ghz ARM board with 512Mb of RAM capable of running Linux. It is similar to a Raspberry Pi (and most of the information here will be applicable to a Pi as well).
These instructions assume that your BeagleBone is using Debian 2015-03-01 and running commands as the root user. You can obtain this version of the operating system here.
If unsure what version is running you can determine it by running this command on the board:
$ cat /etc/dogtag
BeagleBoard.org Debian Image 2015-03-01
Now lets install the software dependencies.
Install Erlang and Elixir
Elixir currently requires Erlang 17.0 or later, the debian packages in the default repositories are too old so we will need an alternative installation method.
One possibility would be to use the nerves project. I recently watched the ElixirConf 2015 - Embedded Elixir in Action by Garth Hitchens presentation and am excited to see where it goes, but for this example it would probably be overkill.
On a desktop PC another option is to use one of the Erlang Solutions repos, but as far as I can tell they only provide recent versions of Erlang built for x86 architectures and the BeagleBone uses an ARM chip.
So it looks like we'll be installing from source.
# ssh in and run these commands on your BeagleBone Black
# It should take you about an hour from start to finish

# Download, compile, and install Erlang
$ apt-get install wget libssl-dev ncurses-dev m4 unixodbc-dev erlang-dev
$ wget http://www.erlang.org/download/otp_src_18.1.tar.gz
$ tar -xzvf otp_src_18.1.tar.gz
$ cd otp_src_18.1/
$ export ERL_TOP=`pwd`
$ ./configure
$ make
$ make install

# Download a precompiled elixir release from
# https://github.com/elixir-lang/elixir/releases/
$ apt-get install unzip
$ wget https://github.com/elixir-lang/elixir/releases/download/v1.1.1/Precompiled.zip
$ unzip Precompiled.zip -d elixir

# Add elixir to your path
# You may want to add this to your .bashrc so you do not have to every time you
# log on
$ export PATH="$HOME/elixir/bin:$PATH"

# Ensure Elixir is working
$ iex
Erlang/OTP 18 [erts-7.1] [source] [async-threads:10] [hipe] [kernel-poll:false]
Interactive Elixir (1.1.1) - press Ctrl+C to exit (type h() ENTER for help)
iex(1)> 1 + 2
3
iex(2)>
# Press Ctrl+C twice to exit iex
We're now ready to explore GPIO (general purpose I/O) on the BeagleBone.
Wire up the LED
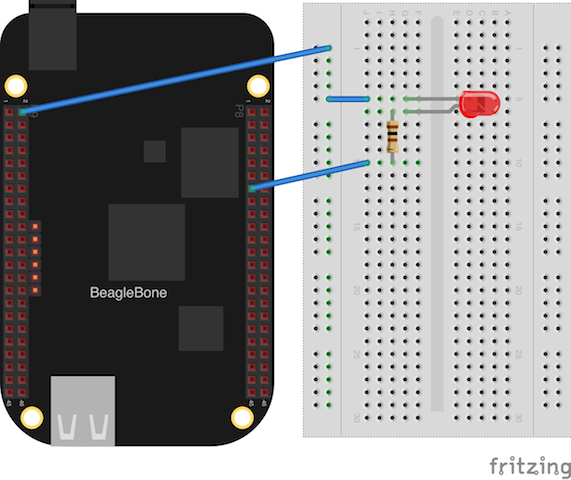
Note: The GPIO pins can only handle 3.3 volts, so be very careful that you do not accidentally connect a jumper to one of the 5 volt source pins. If you are unsure of what you are doing I would highly recommend reading the BeagleBone System Reference Manual to make sure you do not damage your board.
- Using a jumper wire connect Pin 2 on Header P9 (ground) on the BeagleBone to the negative rail on the breadboard.
- Place an LED in the breadboard.
- Using a jumper wire connect the cathode (shorter) wire of the LED to the negative rail.
- Connect one end of a 100 ohm resistor to the anode (longer) wire of the LED.
- Using another jumper wire connect the other end of the resistor to Pin 13 on Header P8
Once wired up we can proceed.
Turn an LED on and off on the command line
In this example we'll be using the built in sysfs to control the GPIO pins. Wikipedia describes it:
sysfs is a virtual file system provided by the Linux kernel that exports information
about various kernel subsystems, hardware devices, and associated device drivers
from the kernel's device model to user space through virtual files. In addition to
providing information about various devices and kernel subsystems, exported virtual
files are also used for their configuring.
This allows us to treat the pins like a file, and while not the most efficient way to work with the GPIO pins, it is very convenient for some use cases.
When you follow along with the example below on a BeagleBone it should make sense.
# A few gpio pins already exist
$ ls /sys/class/gpio
export gpiochip0  gpiochip32  gpiochip64  gpiochip96  unexport

# Export a new one
$ echo 23 > /sys/class/gpio/export

# Notice that gpio23 has now appeared
$ ls /sys/class/gpio
export gpio23  gpiochip0  gpiochip32  gpiochip64  gpiochip96  unexport

# What we can do with gpio23
$ ls /sys/class/gpio/gpio23
active_low  direction  edge  power  subsystem  uevent  value

# Set the direction to out
$ echo out > /sys/class/gpio/gpio23/direction

# Turn on the LED
$ echo 1 > /sys/class/gpio/gpio23/value

# Turn off the LED
$ echo 1 > /sys/class/gpio/gpio23/value


# Now use Elixir to turn the LED on and then off
$ iex
iex(1)> :os.cmd('echo 1 > /sys/class/gpio/gpio23/value')
[]
iex(2)> :os.cmd('echo 0 > /sys/class/gpio/gpio23/value')
[]
Now lets make a module.
Elixir Code
On your BeagleBone create a file called blink-led.ex with the following contents:
defmodule BlinkLED do
  @moduledoc """
  Blink an LED on a BeagleBone Black

  ## Examples

  iex> c("blink-led.ex")
  [BlinkLED]
  iex> {:ok, pid} = BlinkLED.start_link()
  {:ok, #PID<0.102.0>}

  """

  @doc """
  Setup and start the process
  """
  def start_link() do
    :os.cmd('echo 23 > /sys/class/gpio/export')
    :os.cmd('echo out > /sys/class/gpio/gpio23/direction')
    {:ok, spawn_link(fn -> loop() end)}
  end

  defp loop() do
    :os.cmd('echo 1 > /sys/class/gpio/gpio23/value')
    :timer.sleep(1000)
    :os.cmd('echo 0 > /sys/class/gpio/gpio23/value')
    :timer.sleep(1000)
    loop()
  end
end
To run the code you can start iex and do the following:
iex> c("blink-led.ex")
iex> {:ok, pid} = BlinkLED.start_link()
The LED on the breadboard should now turn on for one second, turn off for a second, and repeat indefinitely.